How-To CSV Import Channels for the GMRS-PRO & UV-PRO
This is a comprehensive tutorial that walks you through creating, importing, and exporting channel lists for both the GMRS-PRO and UV-PRO radios. These steps are valid for the radios’ companion apps on iOS and Android.
Overview
Both the GMRS-PRO and UV-PRO share a similar firmware foundation and mobile app interface, making the channel-import process nearly identical. Here are the main differences:
- GMRS-PRO
- Focused on FRS/GMRS frequencies (462–467 MHz)
- Anything outside the core GMRS range must be configured as “RX Only”
- UV-PRO
- Supports transmit (TX/RX) in these bands:
- VHF: 136–174 MHz
- UHF: 400–520 MHz
- Receive-only on:
- AM aeronautical band (108–136 MHz)
- FM broadcast band (88–108 MHz)
- 350–520 MHz (for extended receive coverage)
- Supports transmit (TX/RX) in these bands:
Important: Both radios have 30 channels max per channel group (firmware limit as of now).
Setting Up Your CSV File
Before you open the app, you’ll need a correctly formatted CSV file. You can find a sample CSV file here. If you’re making your own from scratch, follow these guidelines:
- Frequency Columns
- Use integer format, no decimal.
- For example: 147015000 instead of 147.015 (this represents 147.015 MHz).
- CTCSS/DCS Columns (tx_sub_audio, rx_sub_audio)
- CTCSS: Enter as a five-digit integer for standard tones.
- Example: 15140 for 151.4 Hz.
- DCS: Enter as DCS xxxN or DCS xxxI.
- xxx = DCS code (e.g., 023, 114, 311, etc.).
- N = Normal polarity, I = Inverted.
- TX Power
- “H” (High) or “L” (Low).
- Bandwidth
- Often 25000 (25 kHz wide) or 12500 (12.5 kHz narrow).
- Scan Field
- 0 = OFF, 1 = ON.
- If set to 1, that channel will be scanned when “Scan” mode is enabled.
- Other Columns (sign, tx_dis, mute, etc.)
- •0 = OFF, 1 = ON.
- CTCSS: Enter as a five-digit integer for standard tones.
- Follow the sample CSV to keep the same header names and column order.
Note: The app may reject CSVs that have extra/unrecognized columns. Match your CSV fields to the sample template.
Using the App to Import Channels – Access “Channel & Groups” or “Channel Groups”
- Open the Radio App
- Pair/connect your radio via Bluetooth.
- Tap the Gear Icon or Settings in the top-right corner of the channel list.
- Select “Channel & Groups” (or “Channel Groups”).
- You’ll see options for:
- Import From File
- Import Device Channels
- Switch Device Channel Group
- Channel Group 1 (or any existing groups)
- You’ll see options for:
- Choose “Import From File”
- This opens your device’s file browser.
- Navigate to Your CSV File and select it.
- The app will parse the file. If there’s a formatting issue, you’ll see an error.
- Verify Channel Preview
- After a successful import, the app should display the channels (frequency, name, CTCSS/DCS, etc.).
Switching Channel Groups on Your Radio
- Still in the “Channel Groups” Menu: Look for “Switch Device Channel Group.”
- Tap the Desired Group you want active on your radio.
- Confirm. The radio’s main channel screen (home screen) should now display the channels from that group.
Testing & Troubleshooting
- Check Your Frequencies
- Make sure your CSV used the correct integer format (e.g., 147015000 for 147.015 MHz).
- Verify CTCSS/DCS
- A mismatch here can block reception or cause interferences.
- Squelch Settings
- If you’re not hearing audio on a channel, you might need to adjust the squelch (in the app’s “Settings” > “Squelch Level”).
- Firmware Version
- Ensure your firmware is up to date (displayed in “Settings” > “Firmware Version”). Older firmware may not support all CSV features.
- Group Channel Limit
- If you only see 30 channels, and your CSV had 50, the radio might have imported only the first 30. Create additional groups to accommodate more.
Congratulations! You’re now equipped to create your own channel lists in a CSV file, import them into the GMRS-PRO or UV-PRO, and organize them into channel groups. Whether you’re adding a receive only channel, GMRS repeaters, or VHF/UHF ham channels (on the UV-PRO), this flexible import/export feature makes it quick to manage your entire frequency lineup.


Comments (24)
This article is almost great. Please explain the rest of the CSV fields in this article, including mute. I’m assuming that is for public safety channels that I do not want to transmit on.
I had the same question, and spent some time figuring out the answers. Here’s an annotated list of the fields:
title: up to eight letters or numbers
tx_freq: this it the transmit frequency of the radio
rx_freq: this it the receive frequency of the radio. Note that RepeaterBook listings give the repeater’s transmit frequency first.
tx_sub_audio(CTCSS=freq/DCS=number): this is the sub-audio tone sent by the radio, which many repeaters require in order to enable the repeater function
rx_sub_audio(CTCSS=freq/DCS=number): this is the sub-audio tone received by the radio in order to enable the audio signal
tx_power(H/M/L): 7/5/2 watts
bandwidth(12500/25000): Hz
scan(0=OFF/1=ON): include this channel in scans
talk around(0=OFF/1=ON): transmit on the receive frequency of the radio
pre_de_emph_bypass(0=OFF/1=ON): bypass the audio pre-emphasis/de-emphasis circuitry in the radio
sign(0=OFF/1=ON): transmit the user’s call sign after transmissions
tx_dis(0=OFF/1=ON): disable the transmitter
mute(0=OFF/1=ON): mute the audio. For example, if you don’t want to hear the received APRS signals, set this to ON
rx_modulation(0=FM/1=AM):
tx_modulation(0=FM/1=AM):
I think that mute is for digital services like ARPS where you don’t want to hear the audio. It seems to do that for me.
Turning tx_dis ON will block transmissions on that channel. You get a pop-up note on the radio’s display if you try. You should set this for channels that you are not authorized to transmit on.
I am not sure what pre-de-emp-bypass is about, but I think that you can ignore it. It is common in FM modulation (and analog recording) to insert a pole in the audio frequency response at a standardized frequency (pre-emphasis; boosts the high frequencies) and a corresponding zero in the receive audio frequency response (de-emphasis) in order to reduce perceived hiss. This works because voice and some music have less energy in the high frequencies. using pre-emphasis with digital signals might cause over-modulation.
I am guessing that setting sub-audio to 0 disables the selective calling. I hope that the number of digits discriminates between CTSS (tone) and DCS (codes). It is not common to use selective calling in receive when using a repeater. Some people use selective calling in both transmit and receive for simplex, but it’s generally bad practice.
Thanks for the info. I find that importing the sample csv file into a spreadsheet, modifying it, then exporting it in CSV format works well for me. I have lots of radio setups in RT systems and CHIRP that I can copy and paste from. I do this on a PC, you can use a cloud storage service to get the file on your phone or e-mail it to yourself as an attachment.
I got my poles and zeros backward in the pre-deemphasis comment. A zero in the transmit audio response causes the an increase in gain at higher frequencies, starting at the frequency of the zero. A pole in the receive frequency response causes a decrease in gain at higher frequencies, starting at the frequency of the the pole. This works for audio to reduce the apparent hiss at high frequencies because of the masking effect. It should be disabled for digital signals, because it can cause decoding problems.
Or just attach phone to PC via USB and drag and drop
The manual indicates import/export, where do I find the export option for the UV pro in iOS?
This is located under the channel group manager section (export/import group)
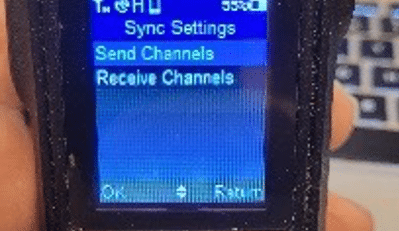
I’m looking in Settings > Channels & Groups > Channel Groups
… and I see these choices:
Import From File
Import Device Channels
Switch Device Channel Groups >
Home ->
Nearby ->
SF North Bay ->
…But I do not see a choice to Export . This is iOS version 1.7
Please advise…
Reach out to [email protected] to be walked through any setup issues
Seems like M power value is ignored when a channel is imported from CSV via iOS app and replaced with L. But when the channel with medium power is exported via the same app – it does contain M in the tx_power column. I haven’t tried import of a channel with H power though, so not fully sure if it just defaults M to L or ignores the value from CSV entirely. My radio is running hte most recent firmware version as of today.
I have changed the Channel “Title” in my spreadsheet, but when I import the CSV file, the titles will not change. I have tried to rename the file. I even did a factory reset of the radio. Still, it displays the original Titles.
I have loaded the CSV files (one for each of the 6 groups with 29 channels in each) to the iOS app, but I can’t seem to upload them into the radio. I must be missing a step. Help!
Ok. I figured it out. First thing: CCTSS tones freqs are 4 or 5 digits (e.g.: 100.9 = “10090” and 88.5 = “8850”); Secondly, there’s a menu selection in the app to upload to the phone once you have the CSV files loaded up to the iOS app…which I finally found!
Thanks for making this guidelines and the sample .csv file available to us. Please clarify how to work with the DCS column/cells in the .csv files, as the advice in your guidelines #“2” is a bit confusing: If the DCS given is eg “D025” like on several RepeaterBook pages Ive seen, what *exactly* do we type into the DCS Number column of our .csv file? Thanks again for your advice.
Im on two UV-Pro’s, with the ios app.
Thanks for making this guidelines and the sample .csv file available to us. I use your sample .csv file on my Macbook Pro, erase contents from the cells, fill in my content, then Airdrop into my iphone to load into the channel groups in the BTech UV-Pro app. Please clarify how to work with the DCS column/cells in the .csv files, as the advice in your guidelines #“2” is a bit confusing to me: If the DCS info given is eg “D025” like on several RepeaterBook pages Ive seen, what exactly do we type into the DCS Number column of your .csv file? For example, do I literally write “DCS025” into the cell of the DCS column for a given channel? (That didnt workk to get the info to my radio-i end up using the DCS scroll in the radio in the app to fill in DCS codes). And if I need to add a “N” or “L” at the end as a 7th digit, where do I find the info to tell me if its the “L” or “N”? I dont see something like that on RepeaterBook.com. Please, type out a line for inside a cell that would be exactly whats needed for a DCS of “D025”. I own 2 UV-Pro’s and am using the ios app.
For those of us without a lot of repeater knowledge, could you please explain the numbers in column tx_sub_audio(CTCSS=freq/DCS=number) more fully
Thanks
My phone, an I 17, will not pair with my UV-PRO. Any tips?
To pair your UV-PRO device with iOS, you need to pair it within the UV-PRO app itself. It seems that you’re trying to connect your device through the Bluetooth settings of your phone, which is not the correct way. Therefore, we suggest you follow the steps below to pair your device with your iPhone:
1. Make sure your UV-PRO device is turned on and in pairing mode.
2. Open the UV-PRO app on your iOS device.
3. Follow the on-screen instructions to complete the pairing process.
However, before pairing your UV-PRO device, you need to delete any prior pairings in the Bluetooth settings of your iPhone. To do this, please follow the steps below:
1. Go to “Settings” on your iPhone.
2. Tap on “Bluetooth.”
3. Find your UV-PRO device in the list of paired devices and tap on the “i” icon next to it.
4. Tap “Forget This Device” and confirm the action.
Additionally, you may also need to reset your network settings on your iPhone to fix any connectivity issues. To do this, please follow the steps below:
1. Go to “Settings” on your iPhone.
2. Tap on “General.”
3. Scroll down and select “Reset.”
4. Tap on “Reset Network Settings” and confirm the action.
Once you have completed these steps, try pairing your UV-PRO device again by following the instructions given above. If you’re still experiencing issues after following these steps, please let us know, and we’ll do our best to assist you further.
When entering DCS tones, simple enter only the number. DCS 053N is entered as “53”. DCS 465N is entered as “465”.
To enter a DTCS code in the CTCSS/DCS column simple enter the 3 digit code. eg D053N is entered as “53”. The leading zero is dropped and the N/I is ignored. D455 is entered as “455”.
I tried these all manner of ways possible and found success by dropping all the prefix/suffix and just entering the 3 digit numeral.
I exported the CSV channel list for a newly-created, empty group, and noticed that there is a new field, prior to the “mute” field. This is with firmware version 0.9.2. Here is what the new header line looks like:
title,tx_freq,rx_freq,tx_sub_audio(CTCSS=freq/DCS=number),rx_sub_audio(CTCSS=freq/DCS=number),tx_power(H/M/L),bandwidth(12500/25000),scan(0=OFF/1=ON),talk around(0=OFF/1=ON),pre_de_emph_bypass(0=OFF/1=ON),sign(0=OFF/1=ON),tx_dis(0=OFF/1=ON),bclo(0=OFF/1=ON),mute(0=OFF/1=ON),rx_modulation(0=FM/1=AM),tx_modulation(0=FM/1=AM)
Does anyone know the meaning of the “bclo” field?
Send your file for quick review to [email protected]
BCLO is Busy Channel LockOut. You can find each header by turning on your radio, connecting to it via the app, go to channels and groups and edit a channel. Each header is listed down the right side in the app.